Showing posts with label baking. Show all posts

Saturday, December 20, 2014

Italian Autumn

The seasons are passing quickly and with Christmas around the corner autumn as already flown by and it's now already late to be posting about our fall adventures. However because I've been so incredibly busy with work, and life in general, the blog has been on hold and so better late than never will have to do. 
Luca and I totally fell for the TV show Bake Off Italia. Every Friday night we would plan to be at home at 9 pm so we could catch the latest episode of Bake Off waiting to be inspired to try something new in the kitchen. Luca took on a whole new interest in baking and is starting to become my competition. So we attempted eclairs, bagels, and for Luca's birthday he wanted a play on the rainbow cake so I made a 5 layer pistachio cake.

Tuesday, October 21, 2014

Bread Project #5

Ravazzata

"'A loaf of bread,' the Walrus said, 'is what we chiefly need: Pepper and vinegar besides are very good indeed.'" --Lewis Carroll

While we were in Sicily we made sure to enjoy the typical foods available to us. A few years ago one of Luca's friends went to Sicily and when he came back he brought some deliciously ragù filled rolls. However Luca didn't know what they were called and as we travelled around the island, he would always try to get one from the bar or bakery when he had the chance. It took over 2 weeks to figure out what they were called.
We also discovered that they are only a Palermo thing and so when we were back there to catch the ferry we stopped and got some to bring back to Luca's family. And of course we had to attempt making them in our own home as well. 
This is no light snack, it's a meal in itself. It's stuffed with meat ragù and the giant roll is made with lard, but what isn't good when it's made with lard? 

 We've tried making ravazzate only once, however we loved the roll recipe which is easy and quick so we've been making batches and freezing them so we can have them with dinner whenever we want. So this a recipe I highly recommend. 

Recipe for Brioche da Rosticceria
8 cups flour
2 cups warm water
1/2 cup sugar
1/2 cup lard
4 tsp salt
50 grams yeast 
Mix flour, sugar, lard, and yeast. Slowly add the warm water. It's best to use a standing mixer with the hook attachment. Mix until the dough starts to form into a ball. Then add the salt. (DON'T FORGET THE SALT) and mix until the dough no longer sticks to the sides of the bowl. 

Once you have a nice round dough ball, rub a thin layer of lard around it. Place it in a covered bowel in a warm dry place to rise. Let it sit for about 20 minutes- until it's doubled in size.  Then you can use this dough to make one large loaf, rolls, or ravazzata.

Bake in the oven at 400º for about 10 minutes. 

I'm not giving the ragù recipe because I didn't particularly like this recipe and there are so many different variations so if you want to make a ravazzata and not just the bread rolls look up a recipe and you'll easily find one! 

Thursday, July 17, 2014

The Bread Project #4 - Guest Post

I thought it would be a good idea to have a guest post from none other than the woman who taught me how to make bread- my mother! 

She is the bread maker master. And the following recipe is delicious and amazing! We always wake up on Easter and Christmas morning to the smell of these delicious buns coming out of the oven. 

Enjoy! 

“Good bread is the most fundamentally satisfying of all foods; and good bread with fresh butter, the greatest of feasts.” 
James Beard

There are very few things in life that have the power to directly connect you to your
ancestral history. Every time I make “Three Day Buns” I can’t help but think that I am
doing the same thing my foremothers and forefathers did hundreds of years ago. Well,
maybe not exactly the same thing, for today I have the convenience of pre-packaged
yeast. My Norwegian ancestors didn’t have that luxury, thus the name “Three Day” buns.
My Grandmother Inez claims that it really did take three days to make these amazingly
tender and slightly sweet, rolls. 

Day 1 - the starter was made. I’m assuming this was similar to a sourdough starter – a
way to cultivate yeast when you couldn’t go to the store and buy it.
Day 2 – use the starter to make the dough, and let it rise. Because it was organically
cultivated yeast, it took a lot longer to rise than present-day dough.
Day 3 – Form the dough into rolls, let them rise again. Then bake them and enjoy the
fruit of your hands and your patience!
I love the thought that I am carrying on a tradition that is centuries old. Three day buns
have been a special treat for our family – made only three or four times a year – mostly
on holidays. They are best eaten right from the oven and slathered with real butter.
Leftover buns can be sliced in half, toasted, and topped with butter, honey, or jam for a
tasty treat. They keep for several days if wrapped in a plastic bag, and they freeze well. 
As I made Three Day Buns today, I was reminded that I am the keeper of the rare gift
of an ancient bread recipe - A recipe representing a long line of bakers symbolizing the
value of life, hearth, and home. As I dream about the day I will teach my grandchildren
how to make Three Day Buns, my hope is that this tradition will continue on for several
more centuries!
Because this recipe has been passed down through the family and is a cherished treasure we prefer to keep it within the family for now, so there isn't the recipe listed. We can't share our best kept secrets! 

Wednesday, July 9, 2014

The Bread Project #2

Ciabatta Bread 

For my second bread attempt, I went with the Italian classic Ciabatta. "Ciabatta" in Italian means slipper , and I suppose this bread kind of looks like a big comfy winter slipper. According to wikipedia this bread was created in the Veneto region as a reaction to the increasing use of  French baguettes to make sandwiches. The Italians decided they need to have their own version of sandwich bread and so hence the ciabatta loaf was born.

I looked at a few different recipes and they were all more or the less the same. They called for a mixer like a KitchenAid. It felt a little strange  using a mixer instead of  kneading the dough myself. I felt like I was cheating on the bread making process. However, all that high speed mixing is what gives it the airy consistency and so it would be impossible to do by hand. (And really I love any excuse to my KitchenAid and so it was a good reason to also try out the hook attachment for the first time.)  
This dough is a "wet" dough. As I was mixing it, I kept thinking I should add more flour because it was so sticky. However it is supposed to be like that. The recipe said that the dough should start to climb up the hook of the mixer and just as it's about to go over that's when you need to stop mixing. I had the mixer on for over 10 minutes and I still didn't see the dough climb. I was worried that I made a mistake in the recipe, that it was too runny, and that I had over mixed it. I sure it was going to be a flop. 
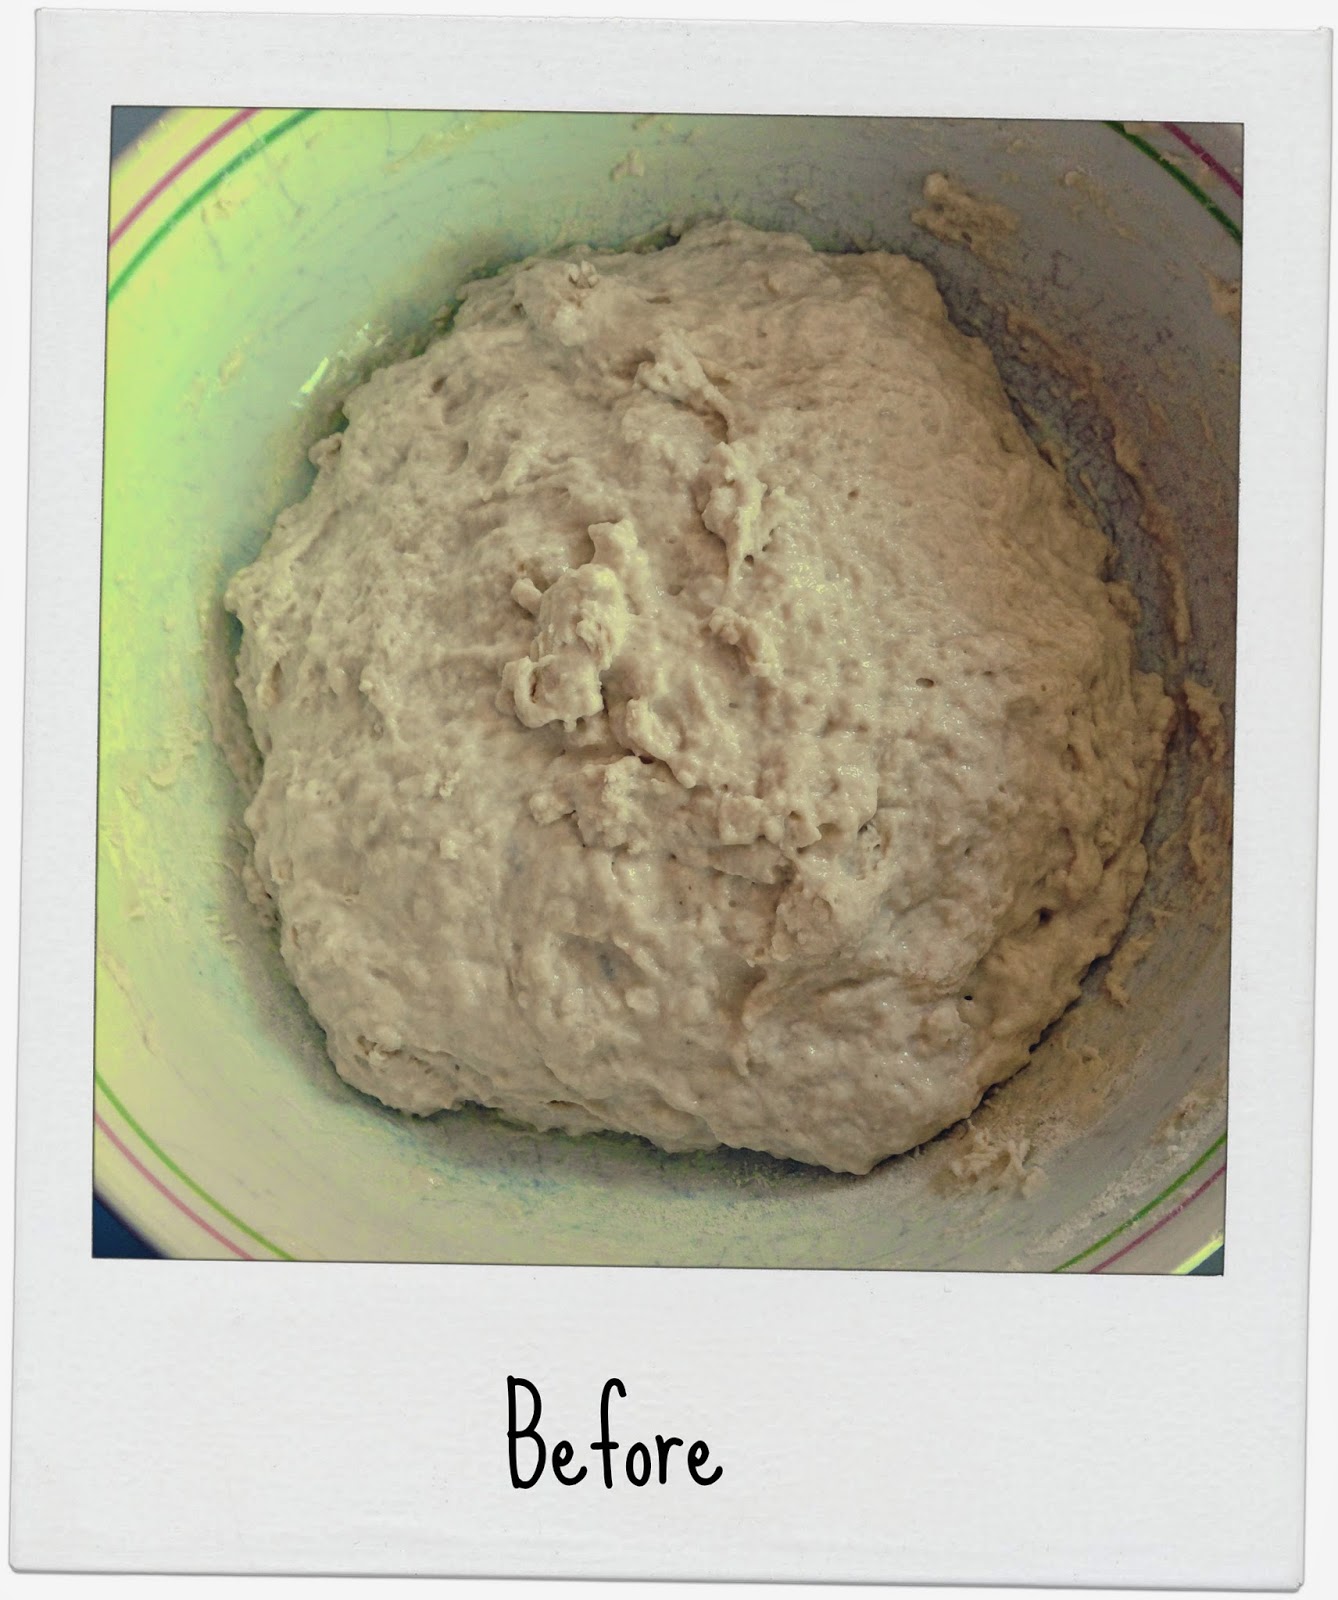
I put the dough in a bowl and set it aside to rise until it was 3 times the original size. It was cool to see how all the mixing made the dough porous-like.
After rising for over 2 hours, I formed the dough into loaves and let is rest for another hour before going in the oven. I felt like my loaves were a little small, however quite a bit of dough was lost in the mixing bowl and the white bowl because it was so sticky. 
Putting flour down to form the loaves helped a lot. 
Looks good! I baked it just right this time. It had a lovely outer crispy crunchy crust. 

And the texture on the inside was perfect! However after Luca and I bit into the fresh warm baked bread we both said it was delicious but something wasn't quite right..... I FORGOT THE SALT!  If I had remembered the salt it would have been absolutely perfect. However that night we had cold cuts and so the salty prosciutto and mortadella were a perfect match for the bread.

This is the recipe I followed from Foodienarium

Quick And Easy To Make Italian Ciabatta

Serves: 2 ciabattas       Prep: 15 mins       Cook: 25 mins     Ready In: 4 hrs 40 mins

Ingredients

Instructions

  1. Mix all ingredients in a mixer with the paddle and let the dough rest for 10 minutes.
  2. Knead the dough with the same paddle at high speed. It will take about 8-10 minutes. Somewhere in the middle of the process I change the paddle to the dough hook. To the end of the process the dough starts to leave off the walls, they will become kind of cleaner. When this starts to happen, closely watch the process. Next, the dough will begin to properly ‘climb’ the hook. Catch the moment before it will climb above the hook and turn off the mixer.
  3. Move the dough into a bowl well-greased with oil and close with the cling film. Let the dough rise in a warm place. It will take about 2.5 hours. The dough must triple in size!
  4. Then throw out the dough onto a work surface really well-covered with flour. Divide the dough into 2 pieces and shape the ciabattas. Poke them a little with your fingers. Sprinkle them generously with flour, cover dough with a plastic bag and leave it for 45 minutes.
  5. At this time, warm the oven with a baking stone to 230C (500F). Also put a pan for water on the bottom. By the way, I use a usual stair tiles instead of the stone and that works well for me.
  6. Next, you need to turn the ciabattas and put them into the oven. I put the baking paper on the plank, sprinkle it with flour and lay ciabattas on it. Then I tap paper with ciabattas on the rocks from this plank right onto the stone. Also pour a cup of boiling water into the pan at the bottom of the oven, cover it, and bake the ciabattas for 15-20 minutes.
  7. When the ciabattas are ready, put them on the wire rack and let them cool.

Thursday, July 3, 2014

The Bread Project

Since it's summer and school is out I've got a lot of free time on my hands. I've decided to try making different bread recipes throughout the summer and hopefully even longer! Why buy bread when you can easily make it right at home? Everything homemade tastes better. 

The smell of good bread baking, like the sound of lightly flowing water, is indescribable in its evocation of innocence and delight." --M.F.K. Fisher

I've always admired people who make their own bread. 

The other day my husband was talking with some friends and said that a meal isn't a meal unless there is bread. So I can try to fulfill my husband's idea of dinner with fresh baked bread right from our home. 

I had wanted to start with Tuscan Bread since my husband is from Tuscany and is a strong believer that it is the best type of bread out there. Tuscan bread doesn't have salt, so it has a particular taste and tends to be dry and crumbly. I looked up the recipe on King Arthur Flour but I needed to make a sponge the night before and so I couldn't make it right away and I wanted to start right in that moment. 

So I looked up an easy bread recipe. And sure enough I found a quick, easy, no-knead bread recipe. I found the recipe link from pinterest and is from the blog The Baker Upstairs. 
Here is the recipe that I followed below, and here is her link.

Crusty Artisan Bread
1 1/2 tablespoons instant yeast
3 cups warm water
1 tablespoon salt
6 1/2 cups unbleached, all-purpose flour, plus more for dusting dough
In a large bowl, dissolve yeast in warm water. Mix in salt and flour, stirring until there are no dry patches. The dough will be very soft and not like a typical bread dough. Cover with a kitchen towel and let rise in a warm place for 2 hours.
After rising, divide dough into two pieces and shape each into a round ball. Place each ball of dough on a piece of parchment paper, and let rest 40 minutes.
During the second rise, preheat oven to 450. Place a baking stone or overturned baking sheet on the upper oven rack, and a broiler pan or metal cake pan on the lower shelf. Heat the baking stone at least 20 minutes before baking.
When the dough is ready to bake, dust it with flour and cut three deep slashes across the top. Slide the dough on the parchment paper onto the baking stone using a pizza peel (or a thin cutting board). Pour a cup of water into the broiler pan/cake pan and shut the oven door quickly. Bake until golden brown, 24-28 minutes.
adapted from Mel’s Kitchen Cafe


My oven is quite small and so I couldn't put both loaves in together. The first loaf I think I took out a little early since it's quite soft and not very crunchy and it's pretty white. I left the second loaf in a little longer and it has a better light brown color, but it still seems a little soft and not the regular artisan bread texture. 

So for my first attempt I'd say it went well! We ate with our dinner and Luca liked it so I think this recipe passed, but could be better. I look forward to baking different breads and improving my bread making skills. 

Wednesday, January 29, 2014

Cakes, Cupcakes, Cheesecakes Oh My!

If you know me, you know I love baking.  

For my first cooking contest I had very difficult time deciding what dessert I wanted to bring. I had finally decided on a brownie mosaic cheesecake. It was my first cheesecake ever. I had never been such a big fan of cheesecakes and so I don't know what inspired to go with that particular recipe. But in any case it was a good choice because I won and it has ever since been  highly requested. I've made that cheesecakes for birthdays, dinner parties, and just because Luca asks for it. 

Unfortunately I don't have picture of the infamous dessert. 

However, over the past year quite a few cakes have been made. Here are just a few photos of my work in the kitchen. And from that very first cheesecake a little over a year ago, I have now attempted to make many more cheesecake recipes! Some are keepers, others not so much. 
Red Velvet Cupcakes for Valentines Day

Tuesday, December 4, 2012

Holiday Festivities Have Begun

It has been quite the start to the month of December. Luca and I put up our first Christmas tree together just a few days ago. We went to the large local grocery store just outside of town to get a nice big fake plastic tree ( a tree is better than no tree). His parents were kind and lent us some of their old decorations  and they remind me of my mom's old ornaments that were passed down to her. We stuck to my family's tradition of having pizza and putting the tree. Luca tackled making a deep dish pizza by hand, and I have to say it turned out delicious enough for seconds! 
Then this weekend we had the annual "Cooking Contest." A fun contest between friends, however taken quite seriously. This year there were two categories, has everyone had decided it was just too easy to win a whole contest with a dessert. You could make an "antipasto"(appetizer) "primo piatto" (first dish such as pasta or risotto) or a "secondo piatto" (second dish of meat) and of course a dessert. 
Luca and I both participated in both categories.
 Luca made Paccheri Rusticano, large round noodles stuffed with a leek, sausage, ricotta filling topped with beschemel and placed in the oven to make a delicious pasta bake. I made gorgonzola chicken cooked up with some white wine, rosemary, and olive oil, tossed in melted sweet gorgonzola and sprinkled with green peppercorns. For dessert Luca made molten chocolate cakes, and I attempted my first cheesecake ever- brownie cheesecake with a chocolate ganache. 
There were 15 people at the contest, however 8 people were there just to judge, because we couldn't have those cooking voting with biased opinions ;) 
Appetizers 
Matteo introduced Corn Dogs with French Fries to Italians
homemade and delicious!
The picture may not be the best but Barbar's "Sformato"
of potatoes, bacon, and cheese

Not pictured: Giani's Pastry Puffs filled with prosciutto cotto, zucchini, and cheese.
Primi Piatti 

"Paccheri Rusticano" Luca's pasta bake, the picture doesn't
give it justice  
"Orecchiette broccoli e bacon" 
Lorenzo's "Pasta Risottato" pasta prepared like risotto
with heavy cream and spinach

Not Pictured: Leopoldo's Vegetarian Cannoli with cauliflower , nutmeg, and cream
Secondi Piatti 
"Spezzatino di Pollo alla Gorgonzola" - My chicken 
"Triple Chicken" - Vittoria made three types of chicken
Curry, Almond, and Mint

Desserts
Matteo's Classic Italian Tiramisù
The 4 German girls who were visiting made a Macedonia
Fruit Salad

Brownie cheesecake with Chocolate Ganache

Not Pictured: Luca's Chocolate Molten Cakes, the German girls Apple Crumble, and Vin Brûlée. 
And there was the judging. The guests who took part of the jury were each given a piece of paper with all the listed dishes. They had to wait until the very end to vote. Once handed in Paola sat down and added up all the votes and it was announced that Luca won first place for the  Main Dish category which also means a very nice dinner out at Osteria Broccaindosso, and my cheesecake won first place for the Dessert category! Luca and I both won and are becoming one exceptionally culinary family! 


Wednesday, May 16, 2012

Culinary Alterations

Cooking in Italy isn't always as easy as you think 
it would be. You can't easily find things like vanilla, brown sugar, measuring cups, tablespoons/teaspoons, and many ingredients come packaged very differently making it difficult to know how much you should buy in order to have the right quantity. 

With my mom we made cinnamon bread tweaked and altered to fit the ingredients we had at hand. I'd say it turned out pretty good despite all the changes! 


I also made some lemon quick bread I saw on a blog. I didn't have vanilla, wasn't able to add the salt and baking soda with the exact measures, wasn't even if sure if I actually used baking soda, and just guesstimated the amount of yogurt I was supposed to add, and it wasn't even the right kind. However again here it was quite delicious and eaten up quickly!


Here is an Italian version of macaroni and cheese inspired by mom. Gramigna pasta, some butter, "sottiletto" cheese, some fresh artisan cheese, and milk. No cheddar or velveeta here! 

Followers